Category: ski touring
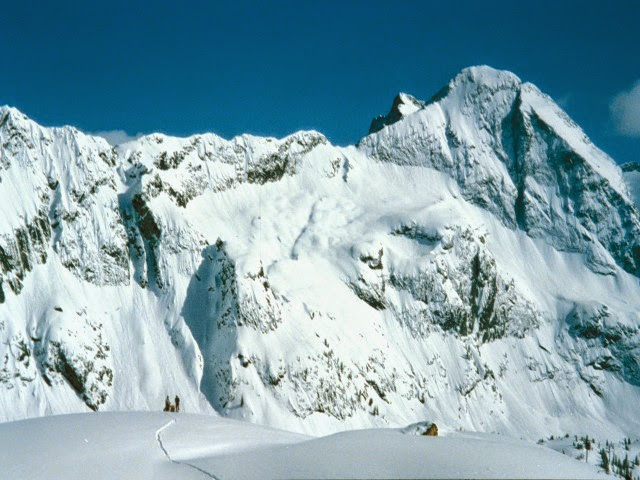
London Ridge
Location: Bear Lake on Hwy 31A.
Time: Full Day
Distance: 5 km
Elevation Gain: 1000m (3,500 feet)
Map: 82
Avalanche Exposure: Complex
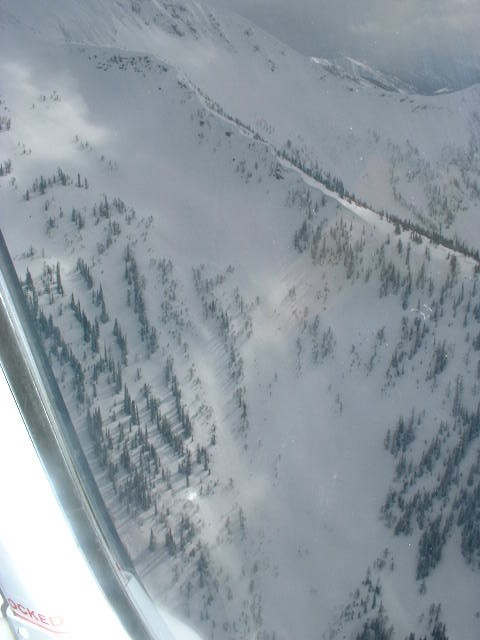
London Ridge is a popular early season destination for the south facing alpine slopes. There are also some huge north facing runs on the Kane Creek side of London Ridge. Park at Bear Lake parking area and cross the road and ascend the old mining roads through the trees until reaching sub-alpine and very steep and exposed terrain with few safe options. There are some alternate options accessing London Ridge through the same access as Whitewater Creek trail.
Backcountry Skiing Daily Preperation
Check the avalanche forecast every day, even if you’re not going into the backcountry. It’s critical to stay on top of current conditions. It helps to know when a layer has been loaded past the tipping point and avalanches are occurring. Follow the entire season in order to recognize trends in stability, weather patterns and snowfall.
Follow the weather. Weather creates snowpack, which means that following the weather can aid in your understanding of the snowpack. Consistent tracking of the weather allows you to observe trends, for example, specific loading patterns for your region, a dry spell that drives facet development, a big wind event that tips the scales and causes widespread avalanching. Knowing the weather history is knowing the snowpack history.
Track avalanche activity. Where have avalanches occurred? Is there widespread avalanche activity? Avalanches in specific locations? How deep are these avalanches? Tracking avalanche activity over a season allows you to better forecast areas of stronger and weaker snowpack. Knowing what has avalanched previously can give you a sense of areas of greater or lesser concern.
Make a plan before you leave the house. After reading the avalanche forecast, recording the weather for the past 24 hours, and looking to see if there was any recent avalanche activity, decide what your objective for the day might be. Ask yourself the following questions:
- Is the terrain appropriate for the conditions?
- Is the terrain appropriate for the group?
Be prepared. Don’t leave the house without making sure you have all of the necessary gear for the day. Carry a beacon, shovel and probe. Make sure your shovel is big enough that it could actually dig your partner out in case of an avalanche. Carry a first aid and repair kit. Take along at least one communication device that has a fully charged battery. Before you begin ski touring, check to see that everyone in your group is well equipped. Do a beacon check and hold a discussion of the plan before you leave the parking lot.
Have an opinion. You might be wrong. You might be right. Either way, you should have an opinion on stability, snow quality, and the day’s plan. Treat this opinion as the day’s hypothesis, to be tested and proven or disproven. You don’t learn about snow and avalanches if you don’t have an opinion.
Have an opinion and test it.
Adjust your plan if conditions are different than you anticipated. Nothing is set in stone. If you are confused or observing conditions that don’t match your forecast and day’s hypothesis, back off. Choose simpler terrain.
Share the wealth –- report your observations. Report snow and weather observations to the forecast center at the end of the day. It’s important to contribute to the community pool of knowledge.
Review your tour at end of day. Be critical of your decisions. Did you make good ones? Did you get away with something? This reflection improves the next day’s hypothesis and drives learning. Ask the hard questions and don’t be afraid to honestly critique your decisions.
Kututle Bowl
Location: Whitewater Ski Area.
Time: Full day
Difficulty: Difficult
Distance: Long
Elevation_Gain: lots of meters
Map: 82 F/6
Avalanche Exposure: Complex
Climb to the summit of Half Dome, or the notch between Ymir Peak and Half Dome and descend into Kututle forever. There are tons of lines out here and a more wilderness feel than any of the other touring areas around Whitewater.
Blaster’s Ridge & Prospector’s
Location: Whitewater Ski Area. Purchase a single ridge ticket and ride the Summit Chair.
Time: Half day
Difficulty: Moderate
Distance: Short
Elevation_Gain: 200 meters
Map: 82 F/6
Avalanche Exposure: Challenging
From the top of the Summit Chair ski left along the run on the top of the ridge. Stop at the top of Motherlode and look for the Ski Patrol Warning Sign in the little dip before the traverse. The route stays closely on the ridge and is used by the Ski Patrol as a safe route to the top of their blasting run during high avalanche conditions. After numerous tight switchbacks the top of the ridge is gained. A steep tree glade named “Garbage Chutes” is an exciting descent next to the route of ascent. There are a series of progressively steeper lines ( N facing ) that continue for the next kilometer along this ridge. The trip out to Sherpa Valley takes the flat ridge to the South with cliffs lining the right hand side. After five hundred meters you will break into a small bowl, known as Sherpa Valley. If you would continue further along the ridge you end up dropping down very low km7 on the access road and Mama and Papa Bear Chutes are down that way too. Alternatively traversing left above the ski area takes you to Prospector Bowl which has some amazing steep lines leading back into the ski area. Climbing further past from Prospector’s takes you into the entrance for West Ymir and continuing on from there takes you to the summit of Ymir Peak along with the south facing lines H8 and the south face of Ymir Peak.
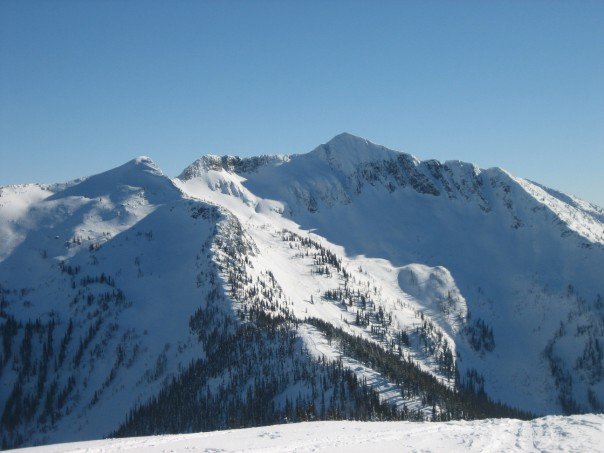
Ymir Peak & Bowl
Location: Whitewater Ski Area
Time: Half day – Full Day
Difficulty: Moderate
Distance: 3km
Elevation Gain: 1500 feet
Map: 82 F/6
Avalanche Exposure: Complex
A number of options are available to gain access to Ymir Bowl and Ymir Peak. The ridge line from Blasters ridge to the summit is the longest route but the most scenic and safest. Alternatively from the White Queen Pass climbing up the ridge and traversing high under the rocks over steep terrain and gaining the ridge. The ridgetop is called Half Dome and good runs can be made form here into Five Mile. From just below the final climb to Half Dome a traverse can be made into Ymir bowl. Ymir Bowl is not a good place to be unless Avalanche conditions are very stable. Once in the bowl Kututle Pass is an interesting destination or Ymir Peak can be gained from the bench just to the left of the Peak. The route to and from the Peak involves careful manoeuvring on rocks and snow on the steep East slopes of Ymir Peak.
Ymir Bowl From lookers left to right
Five Mile Saddle above the lift, Goat’s Slide, Half Dome, Scob’s Knob ( the treed knob within the bowl ), Kututle Notch, Cookie Cliffs, Kuba Chute, Ymir Peak, Dogs Leg, First Choice, Pencil Chute, West Ymir, and Prospector’s Bowl at the edge of the ski area.
Five Mile and White/Black Queen
Location: Whitewater Ski Area. Skin to the top of Yankee Girl.
Time: Half Day – Full Day
Difficulty: Easy
Distance: 3 km
Elevation Gain: 1500 feet
Map: 82 F/6
Avalanche Exposure: Challenging
From the top of the Yankee Girl ski run proceed outside the Ski Area, zigzagging directly upwards to gain the pass ( 15-20 minutes ). The ridge is narrow and offers spectacular views into Five Mile and of Ymir Bowl/Peak. From here steep descents can be made into Five Mile Basin. To go to White Queen summit turn away from Ymir Peak and head NW ( left ) along the ridge. To climb to the summit of Half Dome climb the ridge ( right ) for awesome runs of around 1500 ft. Traversing into Ymir Bowl is also popular from mid-way on the Half Dome ascent.
The far side of Five Mile Bowl offers a further set of adventures with steep climbing, steep skiing and perfect north-west facing powder.
The best way out of Five Mile is by climbing and traversing down the valley through the trees and gaining the White Queen Ridge. Great runs from here on steep West facing slopes down to the Ski Area Access Road. The back side of White Queen is N and NE facing and has become known as Black Queen and has some of the best tree skiing around Whitewater.
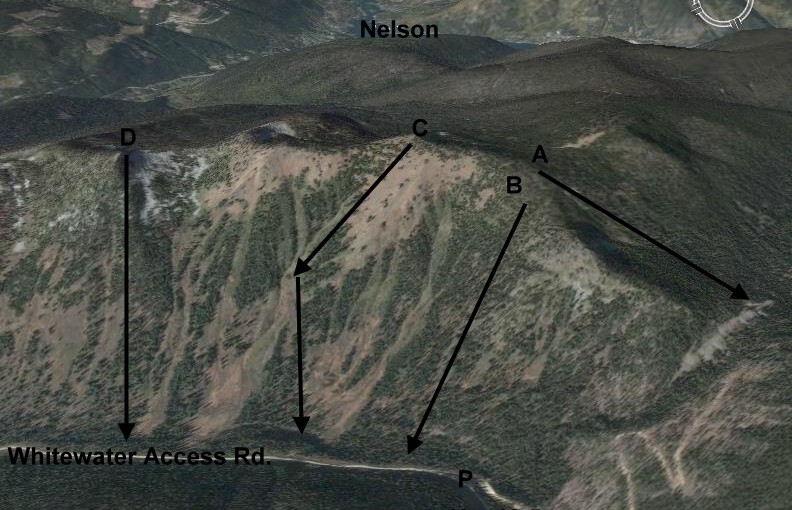
Evening Ridge
Location: 2 Km beforeWhitewater Ski Area at KM 10.5 Parking Area.
Time: Half/Full Day
Difficulty: Moderate
Distance: 5 km
Elevation Gain: 1700 feet
Map: 82 F/6
Avalanche Exposure: Challenging
Park your vehicle in a small turnout at the big bend about 8 kilometers on the Whitewater Ski Area road. Find the logging road that heads down to Apex creek in an upstream direction. Whitewater has created cross country ski trails in this region and so the ski touring access is a matter of following the trails into the drainage. Easiest to take the right hand side of the creek and take the ridge on the right of the creek and when the road crosses the creek again leave the road and follow the creek directly up through Hummingbird Pass. To access Evening Ridge continue all the way through the pass, just before descending, traverse back left, quickly ascending through open trees to gain the ridge above the Pass. Continue up the ridge as far as you desire, with beautiful views of Ymir Peak and the Kokanne Group. Another reasonable and fast possibility includes climbing up descent line B. The descent route is either down the ascent route, or down various lines on the East face. There are several major avalanche slopes and very steep avalanche prone slopes on this face, and require good navigation skills and good stability assessment. Run C called Whale’s back, generally wind affected on the top and sun affected on the lower slopes unless your timing is right.
Barrett Lake
Barrett Lake is a beautiful little mountain lake with a small rustic cabin on the shores. There are opportunities for Quading, hiking, fishing, and camping. Barrett Lake is at 1800 Meters. Popular in the winter for snowmobiling and ski touring.
Driving Directions: Access to the Barrett Lake is via Porto Rico Road, 15 km south of Nelson off Highway 6. In summer you can drive up 3 km and park there. (Recommended Quad Access Only from this point). From here you take the lower fork in the road up another 3 km (this section of road is deactivated but is passable in a high clearance 4X4) to a junction, take a right here (about 6 KM up in total). From here, follow the really rough and rocky road for another 4.5 Km up to the lake, stay on the main road on the way up. The last 4.5 Km is extremely rough, and heads to the East up the drainage crossing a South facing rocky slope.
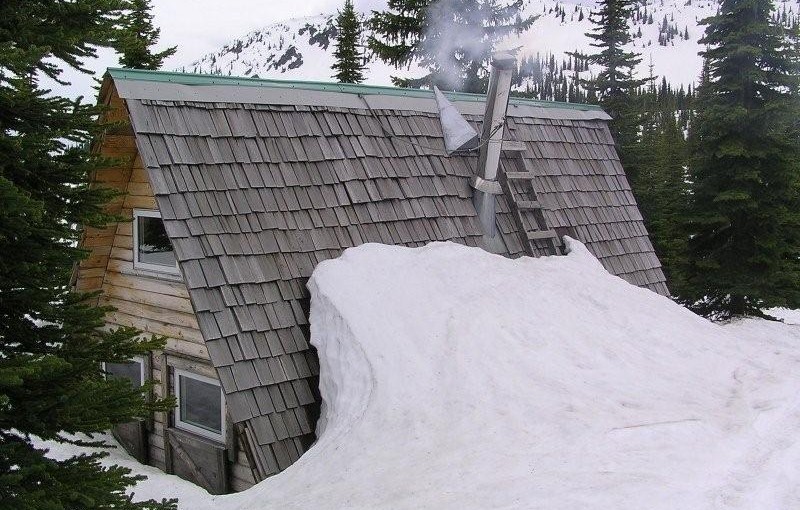
Steed Hut
At 2320 metres, Siwash Mountain is the highest peak in the Bonnington Range, and the Steed Cabin, a snug wood cabin built by the KMC in 1995, lies due south of the summit of Siwash Mountain by a small tarn at 2100 metres. A loft in the cabin can sleep four (no foam mattresses), while the downstairs is equipped with table, bench seats and a wood stove. Basic cooking utensils (pots, pans, cups, bowls, plates, cutlery, etc.) are stored in a plastic bin. There is also a two burner white gas Coleman Stove and Coleman Lantern (take spare mantels). You will need to bring your own white gas for the stove and lantern. There is NO water at the Steed Cabin in either summer or winter. The area around the Steed Cabin is popular with snowmobilers, so expect to see snowmobilers when you are staying at the cabin.The cabin is maintained under partnership agreement with Kootenay Mountaineering Club. For detailed information and driving directions please visit: http://www.kootenaymountaineering.bc.ca
Driving Directions: In winter, it takes two days to reach the cabin via the Bonnington Traverse route. In the summer, a four wheel drive vehicle is not necessary. It is possible to drive to the head of Glade Creek, from here, it is between one and three hours of bushwhacking (thick bush with many black and grizzly bears in the area) to reach the cabin. Follow the following driving directions for summer access. Set your odometer to 0 on Highway 3 at Bombi Summit. 0 km = Munson Road and Highway 3, 2.6 km = powerline spur to (R) 3.7 km = Lower Munson to (L), stay (R), 3.9 km = West Munson to (L), stay (R), 5.4 km = East Munson to (R), stay (L), 6.3 km = spur to R, stay on mainline, 6.4 km = spur to (R) is Grassy access, 10.8 km = small pass, road enters from behind and (L), stay straight down the hill, 11.0 km = road forks, go (R) to stay on Munson Road, (L) fork is North Munson, 15.1 km = pass below Twin Peaks, 18.9 km = fork in road, go (L), 22.6 km, = park here and walk the rest of the way.
( source: rec sites and trails )