Author: kootexp
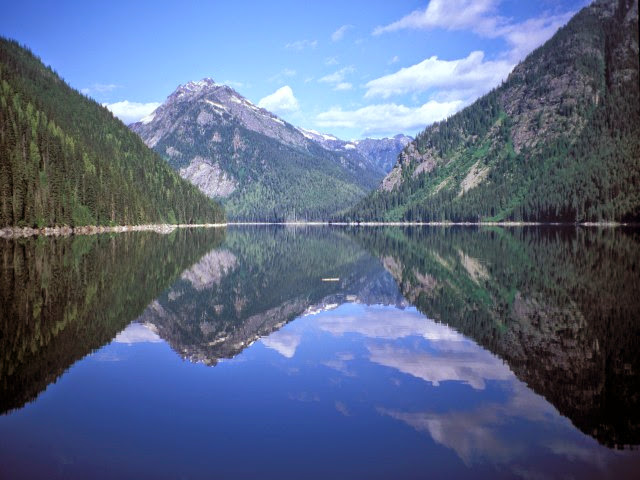
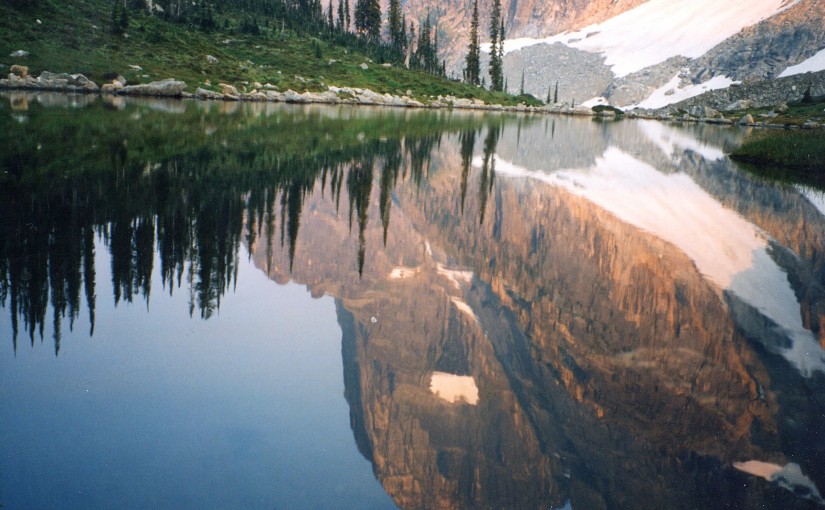
Beatrice Lake – Valhalla Provincial Park
Whitewater Ski Area
Trail Maps
…………………………………………………………………………..
Cradled in BC’s legendary Selkirk Mountains, renowned for epic winters, Whitewater’s dependable dry snowfall totals over 12 meters a season. That’s close to 40 feet. And there’s more. Factor in the 5,400ft/ 1,640m base elevation and the 2,044ft/ 623m vertical drop and you have one memorable ski experience. Whether you choose to experience the new Glory Ridge chair or the originals Summit andSilver King, you will not be disappointed at Whitewater Ski Resort!
Whitewaters Mountain Tours are a great way to see the mountain and learn about navigating around the terrain while learning about the various services that Whitewater offers.
For those looking for a different style of skiing, Whitewater Ski Resort also offers 13km of Nordic Trails.
WHITEWATER ALPINE TRAILS

| Whitewater Ski Resort – Glory Ridge Trail Map Legend | ||
| More Difficult 51. Summit Ski Way 52. Tailings 53. Claim Jumper 54. Morning Glory 55. Ramble On 56. Back Side Ski Way 57. Leave Some 58. Take Some 59. Back Side Ski Out 60. Nickel & Dime 61. Goldigger 62. Silverline |
Most Difficult 63. Buckshot 64. Fuse 65. Bound For Glory 66. Jack Leg 67. Single Malt 68. Det Cord 69. Back Burner 70. Faceplant 71. Trash Glades 72. Jack Leg Glades 73. Lower Jack Leg Glades 74. Ramble On Glades 75. Old Growth Glades 76. Copper Corner |
Extreme 77. Backside Bowl 78. Giddyup Gully 79. Backside 80. Knee Deep Glades 81. Brake Line |

| Whitewater Ski Resort – Summit Trail Map Legend | ||
| Easiest 21. Hummer |
More Difficult 22. Joker 23. Motherlode 24. Sleeper Ski Way 25. Paydirt 26. Bonanza 27. Gold Pan 51. Summit Ski Way Extreme |
Most Difficult 28. Catch Basin 29. C Shaft 30. B Shaft 31. A Shaft 32. Enchanted Forest 33. Catch Basin Ski Way 34. High Grade 35. Powder Keg Bowl 36. Galena 37. Quicksilver Glades 38. Blast 39. Sleeper 40. Blast Skiway 41. Ignitor 42. Diamond Drill 43. Dynamite 44. Glory Basin 45. Summit Chair Skiway 46. Parking Lot Skiway |
Whitewater Ski Resort – Silver King Trail Map

| Whitewater Ski Resort – Silver King Trail Map Legend | ||
| Easiest Trails 1. Silver King Skiway 2. Quartz Skiway 3. Upper Concentrator 4. Kootenay Flats 5. Little Mucker 6. Yankee Girl 7. Crystal Skiway 8. Sluice Box |
More Difficult 8. Sluice Box 9. Canadian Belle 10. Huckleberry Trail 11. Jackpot 12. Silver Ledge 13. Racers Line 14.Yankee Girl
|
Most Difficult 15. Nugget 16. Tramline 17. Concentrator Trees 18. Lower Concentrator 19. Kootenay Belle 20. Rockers RP Rail Park |
WHITEWATER SKI RESORT – WHITEWATER NORDIC TRAILS

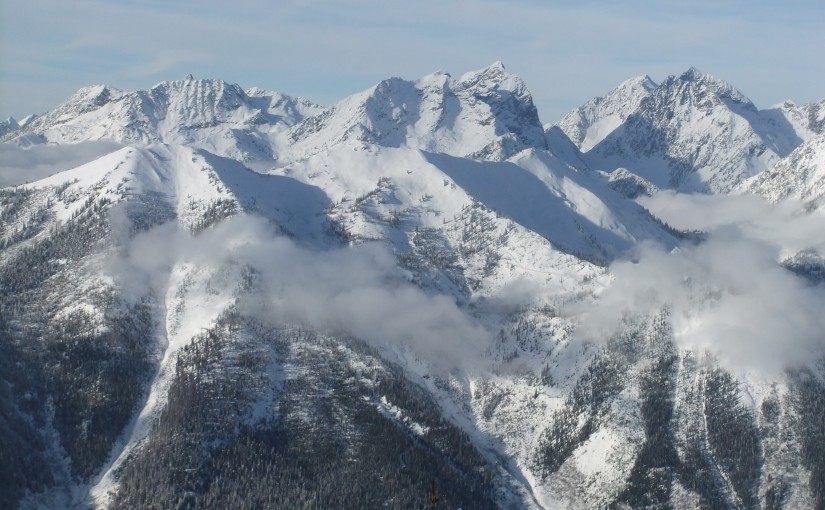
Aerial View from Ymir Peak looking West at Whitewater Ski Resort

Aerial of the new Glory Ridge Terrain at Whitewater Ski Resort

………………………………………………………………
“Whitewater Ski Resort really surprised and amazed me. It skied much bigger than the statistics implied. The mountain has great groomers, and some of the best tree runs I’ve seen! The people were very friendly and helpful. I would love to go back there again, hopefully with a lot of friends!”Mark Baechle, Blue Ridge Ski Club
……………………………………………………….
from whitewater ski resort website.
Butters
Butters is rapidly becoming one of the most popular mountain bike trails in the Slocan Valley. Access is up a steep logging road which if you are not super fit you should definitely consider shuttling this one. The climb is relentless and a little rocky. Take the first left to access lower Butters which is a little steeper and technical than Upper Butters. Lower Butters is mostly blue with some black diamond sections. Upper Butters starts from the second left and is nice and flowy. Small signposts at the trailheads but helpful to have the GPS trail information particularly for accessing the top of lower butters.
Kuskanax Creek Trail
Lots of information on trails in the nakusp region at www.nakusptrails.ca
this trail makes an awesome option to hike up, do a hot springs soak and then return, or mountain bike up and return, or a descent from the hot springs with someone else driving your vehicle for the pick up. can be easily combined with kimbol lake trail.
Valhalla Provincial Park
Popular hiking and alpine rock climbing destination.
Hikes:
Mt Gimli
Mt Dag
Alpine Climbs:
Mt Gimli
Mountains:

Mt Gimli
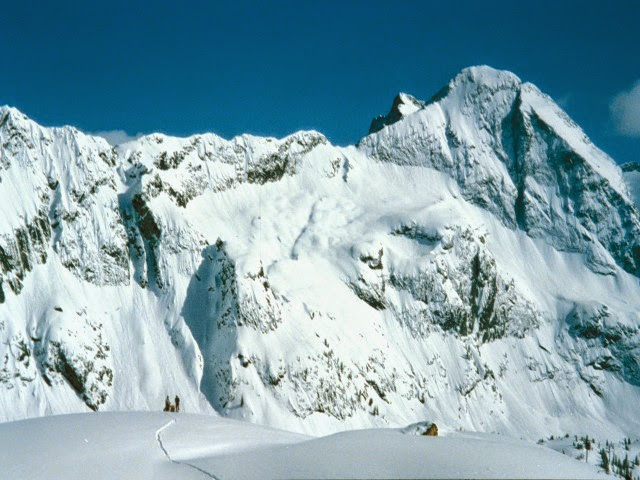
On the edge of the Valhalla Park Mt Gimli is a popular hiking and climbing destination as well as the entry point into the amazing Mulvey Basin.
The 5.10- SE Ridge of Mt Gimli is a 5 star classic multi pitch rock climbing route. The descent is the popular East Ridge which is also a very popular class 4 scramble.
London Ridge
Location: Bear Lake on Hwy 31A.
Time: Full Day
Distance: 5 km
Elevation Gain: 1000m (3,500 feet)
Map: 82
Avalanche Exposure: Complex
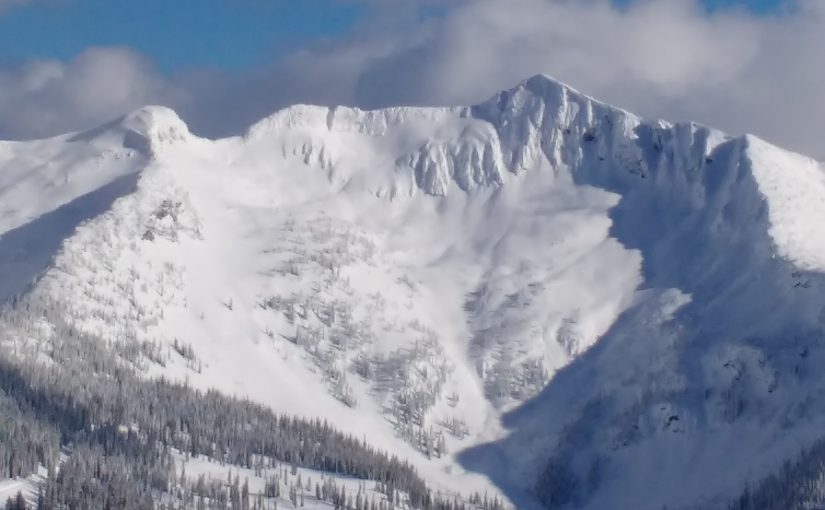
London Ridge is a popular early season destination for the south facing alpine slopes. There are also some huge north facing runs on the Kane Creek side of London Ridge. Park at Bear Lake parking area and cross the road and ascend the old mining roads through the trees until reaching sub-alpine and very steep and exposed terrain with few safe options. There are some alternate options accessing London Ridge through the same access as Whitewater Creek trail.
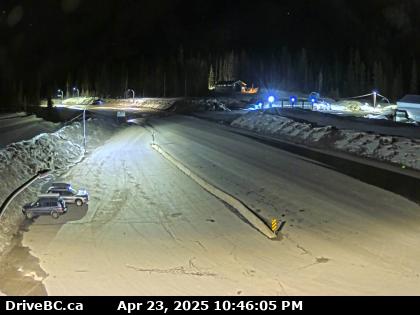
Kootenay Winter Web Cams
KOOTENAY PASS (HWY 3)
Salmo Creston Highway Summit, looking east. (elevation: 1781 metres, 5800 ft)
WHITEWATER SKI RESORT
Base Lodge (elevation: 1646 metres/5400 ft)

WHITEWATER SKI RESORT – W VIEW
Top of Glory Ridge Chair (elevation: 2045 metres, 6710 ft)

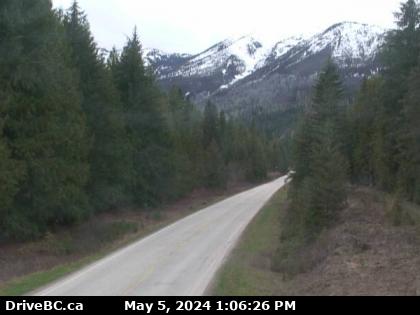
RETALLACK
Hwy 31A, between New Denver and Kaslo, looking west. (elevation: 1023 metres, 3375 ft)
POWDER CREEK SW VIEW (PURCELL MTNS)
(elevation: 2150 metres, 7100 ft)

Backcountry Skiing Daily Preperation
Check the avalanche forecast every day, even if you’re not going into the backcountry. It’s critical to stay on top of current conditions. It helps to know when a layer has been loaded past the tipping point and avalanches are occurring. Follow the entire season in order to recognize trends in stability, weather patterns and snowfall.
Follow the weather. Weather creates snowpack, which means that following the weather can aid in your understanding of the snowpack. Consistent tracking of the weather allows you to observe trends, for example, specific loading patterns for your region, a dry spell that drives facet development, a big wind event that tips the scales and causes widespread avalanching. Knowing the weather history is knowing the snowpack history.
Track avalanche activity. Where have avalanches occurred? Is there widespread avalanche activity? Avalanches in specific locations? How deep are these avalanches? Tracking avalanche activity over a season allows you to better forecast areas of stronger and weaker snowpack. Knowing what has avalanched previously can give you a sense of areas of greater or lesser concern.
Make a plan before you leave the house. After reading the avalanche forecast, recording the weather for the past 24 hours, and looking to see if there was any recent avalanche activity, decide what your objective for the day might be. Ask yourself the following questions:
- Is the terrain appropriate for the conditions?
- Is the terrain appropriate for the group?
Be prepared. Don’t leave the house without making sure you have all of the necessary gear for the day. Carry a beacon, shovel and probe. Make sure your shovel is big enough that it could actually dig your partner out in case of an avalanche. Carry a first aid and repair kit. Take along at least one communication device that has a fully charged battery. Before you begin ski touring, check to see that everyone in your group is well equipped. Do a beacon check and hold a discussion of the plan before you leave the parking lot.
Have an opinion. You might be wrong. You might be right. Either way, you should have an opinion on stability, snow quality, and the day’s plan. Treat this opinion as the day’s hypothesis, to be tested and proven or disproven. You don’t learn about snow and avalanches if you don’t have an opinion.
Have an opinion and test it.
Adjust your plan if conditions are different than you anticipated. Nothing is set in stone. If you are confused or observing conditions that don’t match your forecast and day’s hypothesis, back off. Choose simpler terrain.
Share the wealth –- report your observations. Report snow and weather observations to the forecast center at the end of the day. It’s important to contribute to the community pool of knowledge.
Review your tour at end of day. Be critical of your decisions. Did you make good ones? Did you get away with something? This reflection improves the next day’s hypothesis and drives learning. Ask the hard questions and don’t be afraid to honestly critique your decisions.